How To Allocate More RAM To Minecraft 2022 (Windows Step-by-Step FPS Boost)
I played a few rounds of Minecraft again today with an old buddy until he complained about FPS drops... which is not surprising as there is so much garbage on his PC. Anyway, we then allocated more ram to his game and it was smoother than ever. And that's why I'm showing it to you now.
It's surprising because most of the ones I've heard of deal with FPS boosts packs and such, but never with RAM.
So the game's performance may be affected by various factors (like for example a crowded pc like at my buddy's place), including the amount of RAM allocated to it. Allocating more RAM to Minecraft can lead to faster performance, smoother gameplay, and reduced lag. In this article, I will show you how to increase the RAM in your Minecraft using the normal Minecraft Launcher.
What is RAM and Why Does Minecraft Need More of it
RAM (Random Access Memory) is a type of computer memory that allows your system to store data temporarily. In simpler terms, it is a fast and volatile storage that the computer uses to access data quickly. Whenever you launch an application or game like Minecraft, the computer loads a portion of the game's data into the RAM for faster access. When the game needs to access this data, it can quickly retrieve it from the RAM instead of the slower hard drive.
In the case of Minecraft, allocating more RAM to the game can significantly improve its performance. This is because Minecraft is a resource-intensive game that relies heavily on RAM for its operations. When you allocate more RAM to Minecraft, it can load more game data into the memory, resulting in faster performance, smoother gameplay, and reduced lag.
How to Increase RAM in Minecraft for Windows
There are several methods you can use to increase the RAM allocated to Minecraft. I will cover the Minecraft Launcher (Windows since most of you use it).
Here's how to increase the RAM in Minecraft:
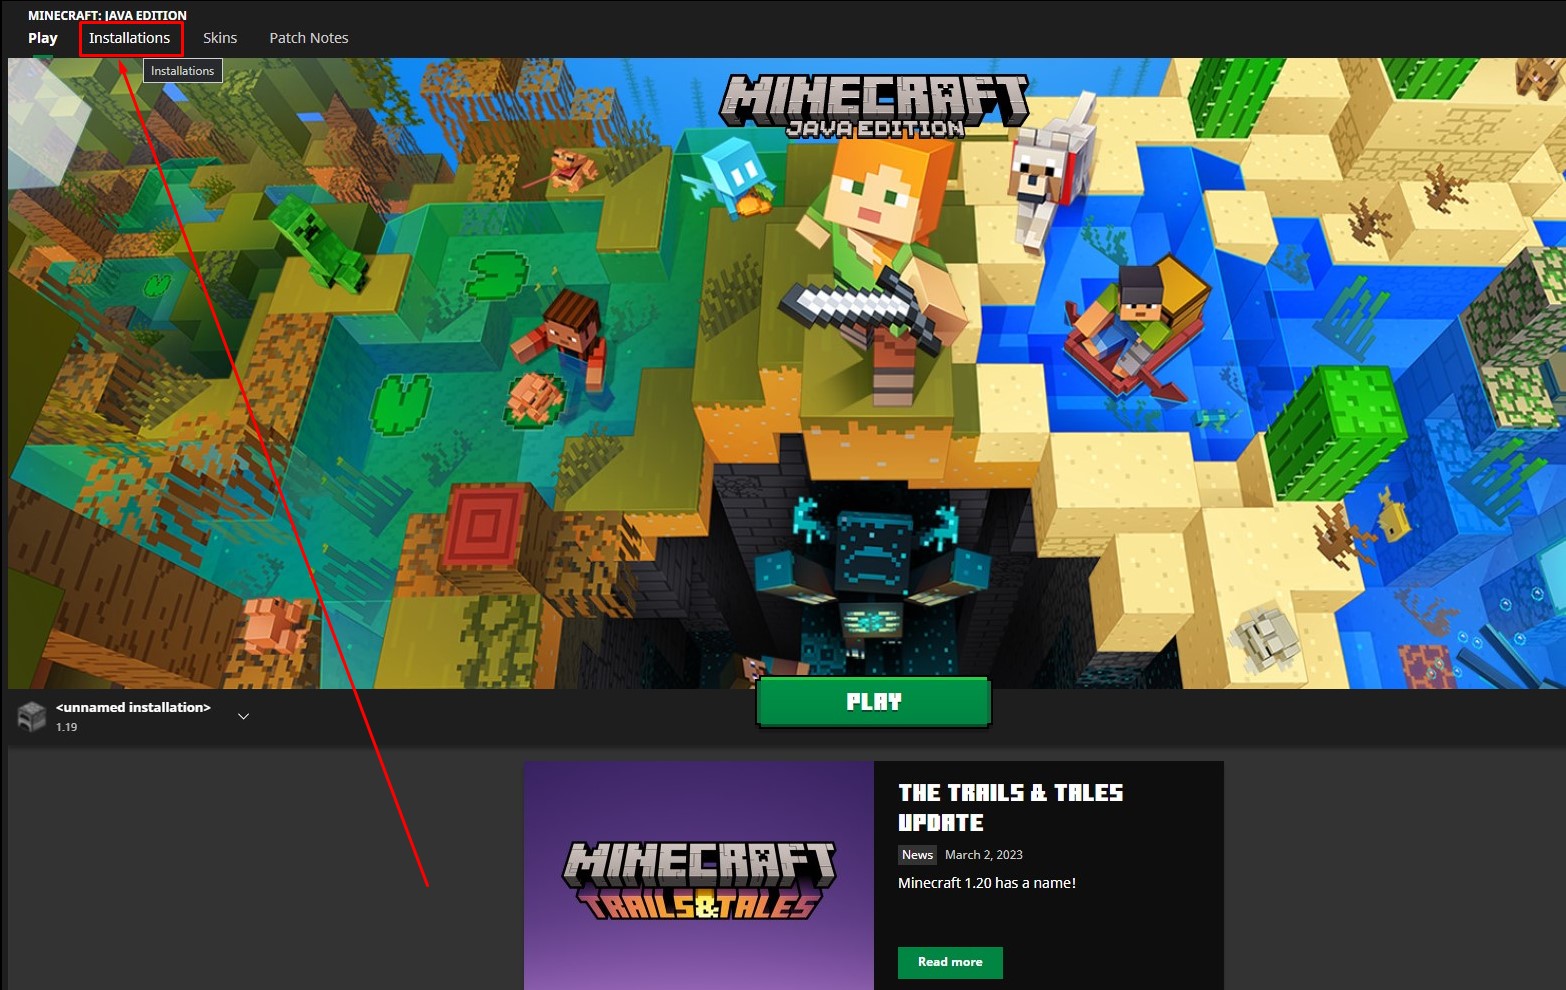
- Launch the Minecraft Launcher on your computer.
-
Click on the "Installations" tab, then click the Minecraft profile you want to allocate more RAM to.
-
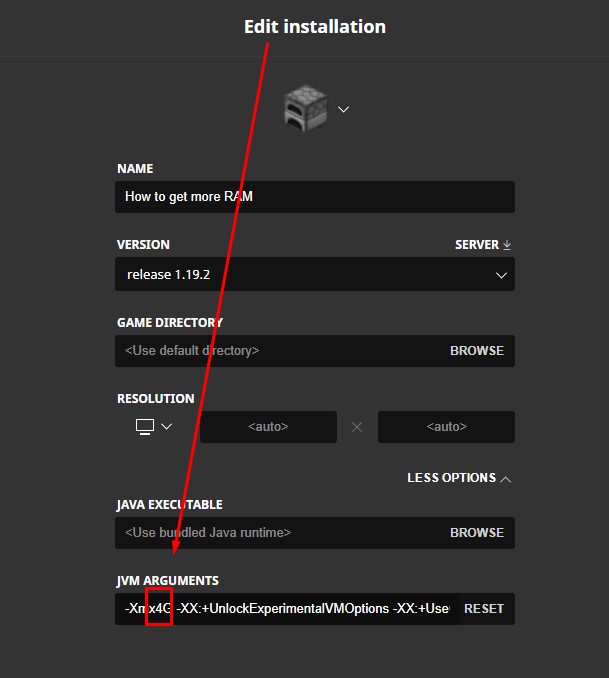
Click on "More Options" under the selected Minecraft version.
Below you can see a field called "JVM Arguments" with lots of crazy letters. At the beginning you should see something like this: "-Xmx4G".
The number in front of the big G, in my case 4, tells how many GB of RAM are allocated.
This is the number we change. Set it to about half of your available RAM on the PC. If you have 8 GB of RAM, set the number to 4. If you have 16 GB of RAM, set it to 8.
Check out the following tutorial if you want to know how much RAM your computer has .
-
To save the changes, click "Save" on the bottom right.
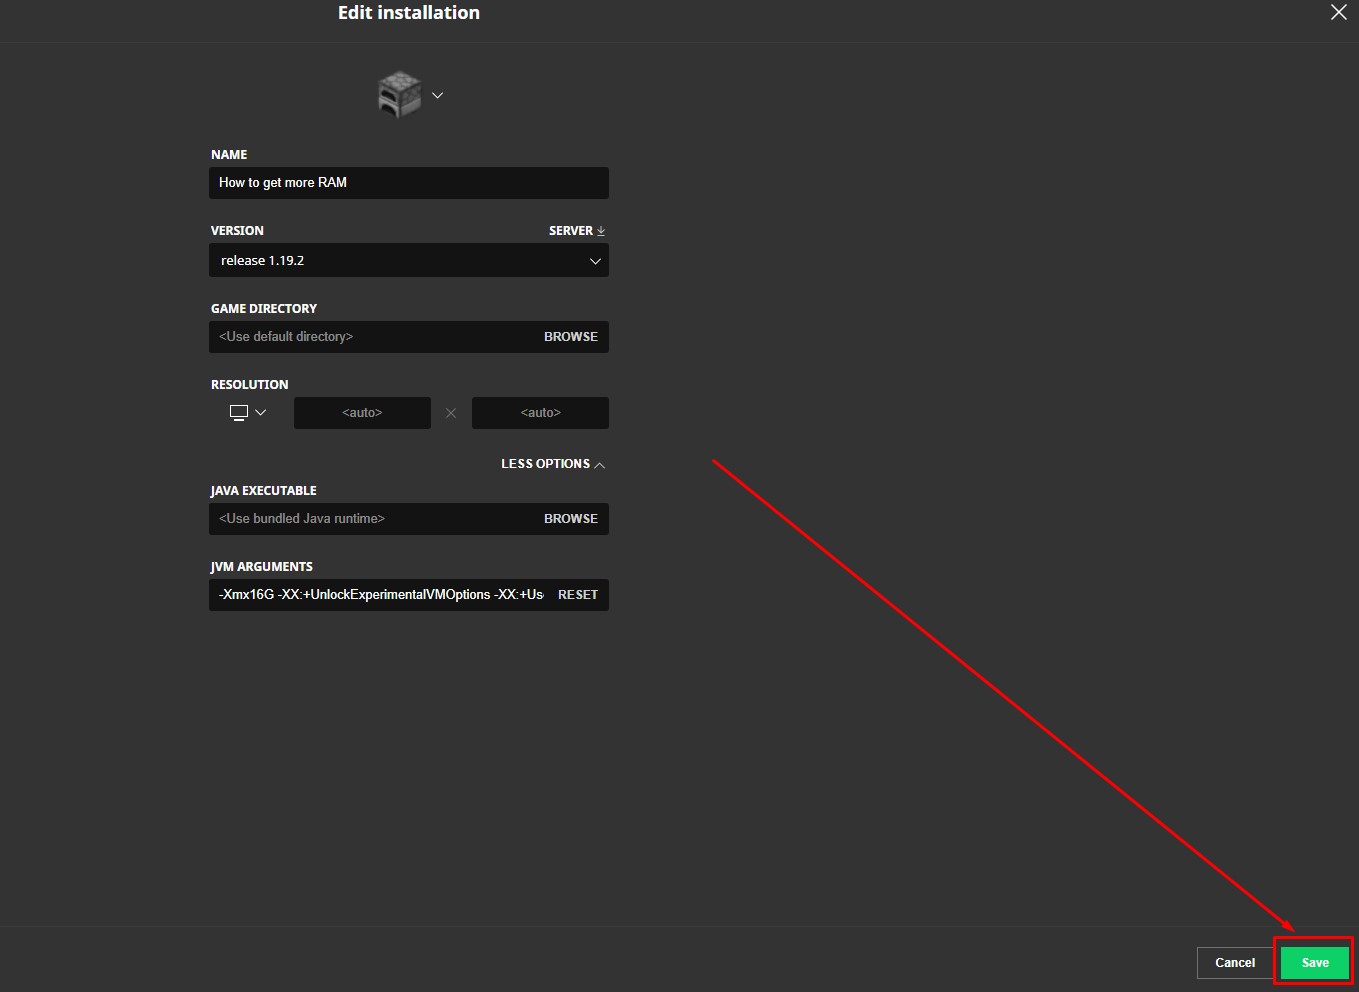
- Now you are ready and can start the game and your PC will give you more space for Minecraft.
If there are problems starting, reset the number a bit and make sure you haven't changed anything else except the number.
It really helped me when I first heard about it because it boosted my FPS and made my Minecaft smoother.
I hope it helped you too, feel free to share this trick with your friends.
Also, make sure to check out other articles from us on our blog page.